IMPROVE MY GAME
Articles
Jason Glass Discusses Glute Activation and Training on Unstable Surfaces
(TPI instructor Jason Glass responds to questions on Twitter that use the hashtag #YOJAY. In the video above, Jason shares his opinion of training on unstable surfaces and tips for glute activation, including important ideas about the ideas of progression and regression. We asked Jason to write a few words to expand on the concepts he discussed in the video).
By Jason Glass:
The key to effectively choosing the right corrective exercises is picking the right position, intensity, complexity and form of resistance or assistance. Finding the correct glute activation or strengthening exercise that is right for you can be tricky. I recommend you attempting your desired exercise and determining if you are able to successfully perform the exercise with correct form without compensation.
A great place to start is the TPI Level 1 Glute Bridge Test.
This test will indicate whether or not you have adequate glute strength and stability in a supine bridge position. If you are successful at holding the single leg bridge position for 10 seconds per leg without your hips dropping, rotating or cramping in the low back or hamstrings, you can progress to glute strengthening exercises.
If you struggle with the single leg bridge you need to regress to some lower level glute activation exercises. Regression and progression in any exercise will involve loading or unloading the joint by changing the position of the exercise. This is something we discuss in depth in TPI's Fitness Level 2.
In the glute progression you can start lying supine (on your back) or prone (face down) where there is no load on the hip joint. The Deer in the Headlights exercise is performed in the supine position.
By removing the load from the hips we can focus on glute activation or connecting the brain to the muscle. By placing your hands under your glutes you can assess your ability to contract, relax and activate your gluteal muscles without hamstring or low back involvement.
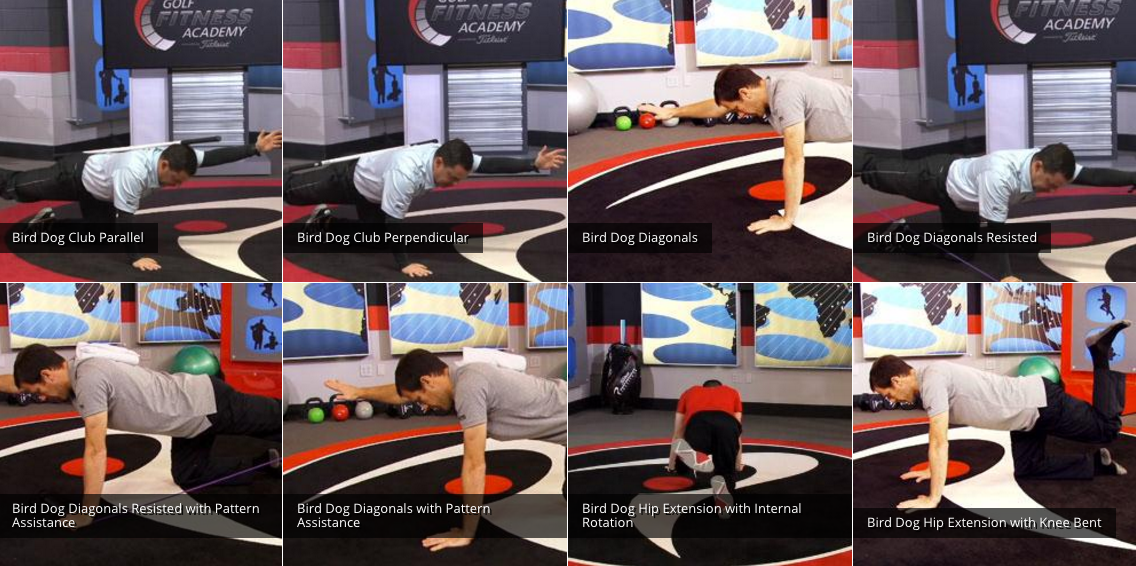
Moving to a quadruped position (hands and knees) the hip and shoulder are loaded. Now the muscles that were relaxed in the supine position are put into action with the role of stabilizing the hip. Performing the Bird Dog exercise involves one hip stabilizing while the other glute is extending the hip against the resistance of gravity.
Isolating hip extension without lumbar extension or any other compensation from adjacent segments of the body increases the complexity and intensity of the exercise. In the TPI Fitness 4x4 Corrective Matrix we would then progress to 1/2 kneeling and tall kneeling position. This is the first time in our progression that the spine is loaded. This will add new demands on the glutes and pelvic stabilizers.
Performing Tall Kneeling Step Outs (See Attached Video) will require the glutes to act as a hip extender and stabilizer while the other leg is driving forward and flexing the hip. The final position in our corrective protocol is the standing position.
Standing Isometric Wall Presses (featured at 3:30 in #YOJAY 5) are great for activating the glutes and connecting the brain to the glutes in the standing or athletic position. The exercises featured in this article are just some samples of different movements performed in each position to highlight how body position affects the complexity and intensity of the glute exercise. There are 100’s of variations and different ways to activate and strengthen the glutes. That number increases exponentially when we move from corrective to strength and power exercises for the hip extenders. But that is a completely different kettle of fish and we will save that for a future article.

Jason Glass BHK, CSCS, TPI Advisory Board @jasonglasslab Host of the Coach Glass Podcast on iTunes Website: http://www.jasonglassperformancelab.com/
